Table of Contents
Using and Defining Filters
Filters are an effective search tool that can rapidly group records in a module. You can limit your search to selected columns and search criteria.
Steps to create a custom Filter.
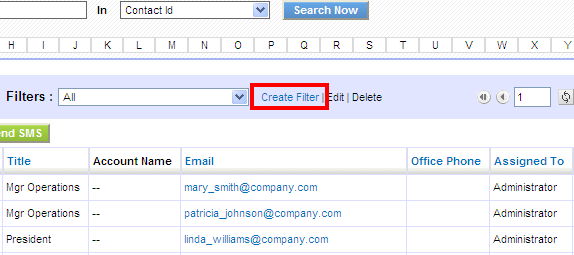
Select a module and click Create Filter link (highlighted below) in the list view of a module.
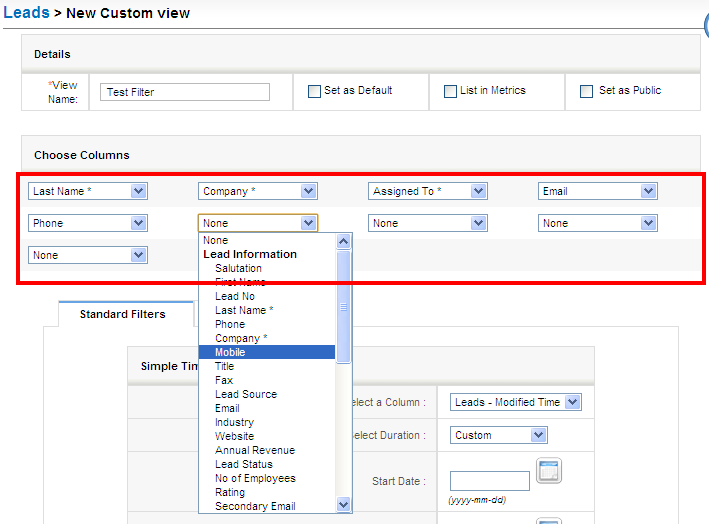
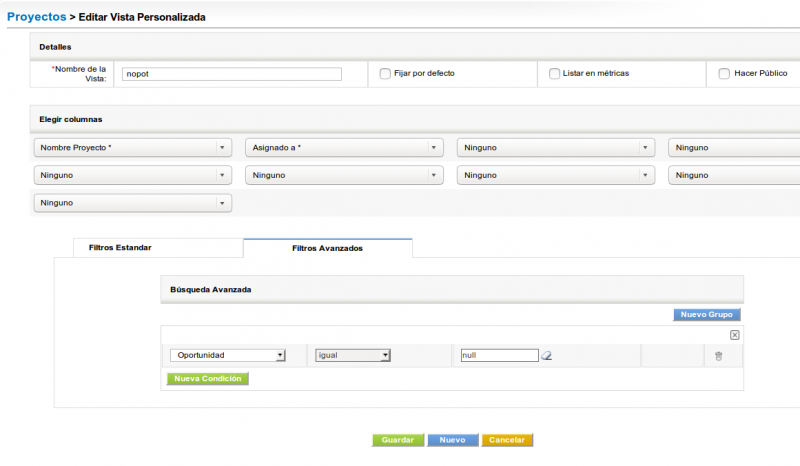
Provide a name to your filter in View Name and select the columns that you want to be displayed in list view, when filter is selected.
The module's link field should be mapped or you will not be able to access the detail view.
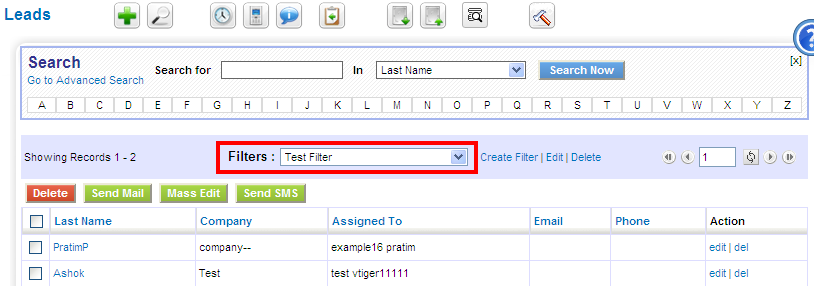
On save you will be able to see filter in action. At this point you can see the list of records in selected columns.
Both Standard Filters and Advanced Filters are used to enhance and refine your filter.
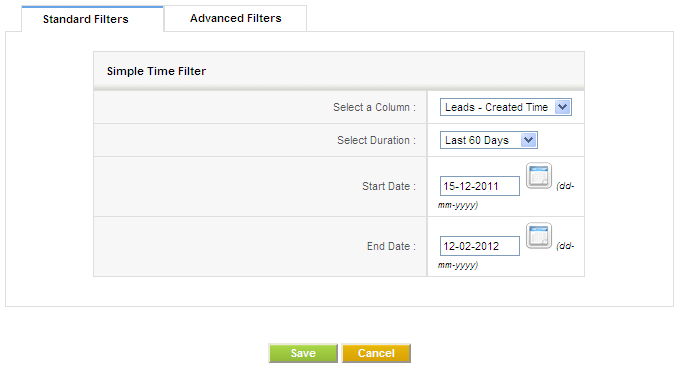
Standard Filters refine the search depending upon date intervals or particular period. You can find these options available:
| Select a Column | This picklist allows users to refine search depending upon record Date fields. |
|---|---|
| Select Duration | This picklist allows users to select time duration in accordance with the Select a Column option above. |
| Start Date and End Date | You can fill these fields manually or if you select the duration, these fields will be automatically filled. |
Advanced Filters refine the search depending upon field values conditions specified.
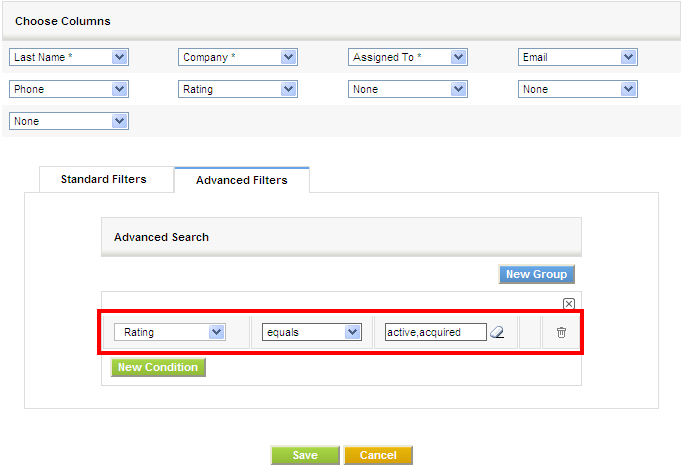
This block contains three columns. Select the desired field name from the picklist in the first column, set the desired condition from picklist in second column and enter one or multiple items in third column manually. Items you enter in third column should be separated with commas.
For example:
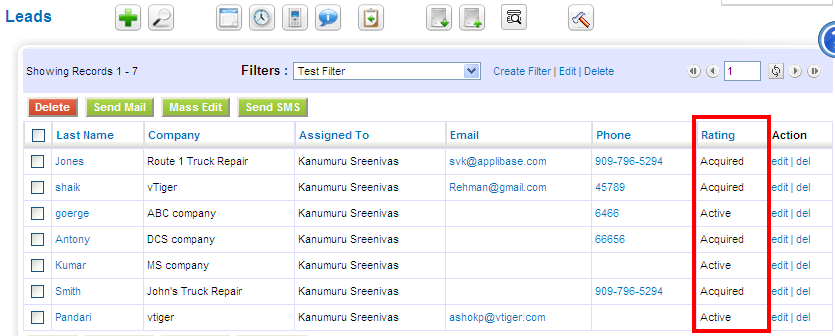
After saving you will see the list of records the fulfill the conditions in the list view.
List in Metrics
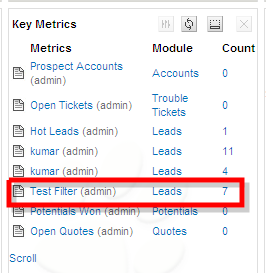
This option if enabled will show the count and details of the filter in the Key Metrics widget on the Home Page.
Set as Default
If this option is enabled, then this filter will be the default view loaded when you first access the module. Once you have selected another filter that selection will prevail until you exit the system.
Set as public
If this option is enabled, every user of the application, irrespective of role/position can view it. When a user marks a custom filter as public, it should be first approved by the admin user. It remains in pending state until an administrator approves it. Administrators can see the request in the Pending section.
The rule is: when a user makes a filter, only he and administrator users can select/edit it. If the filter is marked as Public AND approved, all users can select it, but only he, administrator users and users in a superior role can edit it.
Meta variables for special fields
Current User
When searching on user fields like Assigned To, Creator or Modified By the system expects you to give the full user name to search on. In other words you have to use the first and last name of the user like this:
assigned_to = user.first_name + ' ' + user.last_name
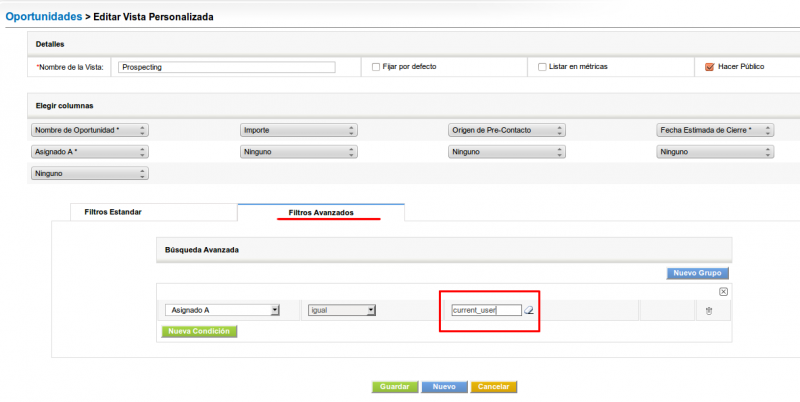
A typical situation that arises often is the need to create a filter and show only the “current user”'s records. So you create a filter of activities to be done “today” and you don't want to have to create 50 “today” filters. one for each of your 50 users. Exactly the same way you don't have to create 365 filters for each day of the year for your “today” filter.
To accomplish this we can use a special meta-variable when defining our filters for the user fields. This field is called “current_user” as can be seen in the next image.
Blank Dates
You can search on blank dates using the dollar sign $
